

Creating a better User Experience even while your user awaits!
Loading data now days is done in browser or application itself, rather than the server.This mitigates the need of waiting for ages for the data to finally come back and load in user’s application. Despite of it however, fetching data from the browser also takes time as it is an asynchronous task, thus we some some sort of loading screen to assure the user about it.
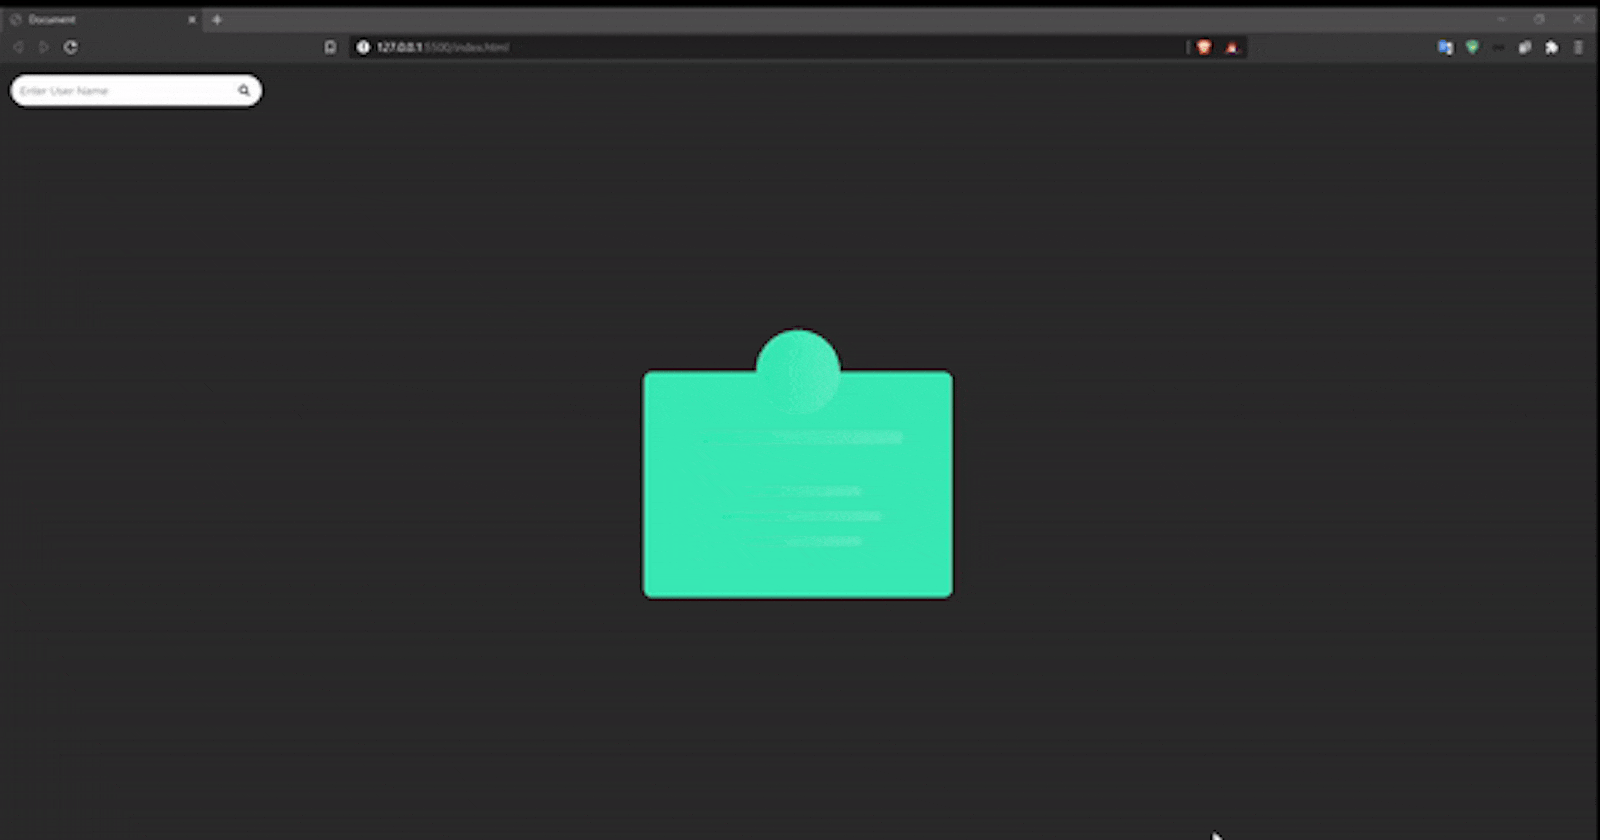
Skeleton Screens has been around for some time lately and it is for a good reason. Having just a simple blob or a square animating with a text saying “Loading” is very boring to look at which makes users not to stay on your application for a long time. Skeleton Screens however are able to hold off the users for a longer time as they give indication of the layout in which the content will appear. This has been proven to be a better experience than using a traditional loading spinners, loaders or animated text.
Here are some examples of skeleton screen used in many web apps like Facebook, YouTube, Discord, etc.
 Facebook’s and Google’s Skeleton Screen before content is loaded in the application
We will also be building an application in HTML, CSS and JavaScript where we will be send an API (GitHub API) to the server, get a response back and display the content once we receive it. In doing so, while we wait for the data to load, we will display an animated skeleton screen to indicate the eventual layout in which data will be placed. This serves three purposes:
Assures User that the screen is Loading and Data is being fetched
Gives a visual representation of how the data will be places once it comes back
Makes the boring loading text or animations look way cooler
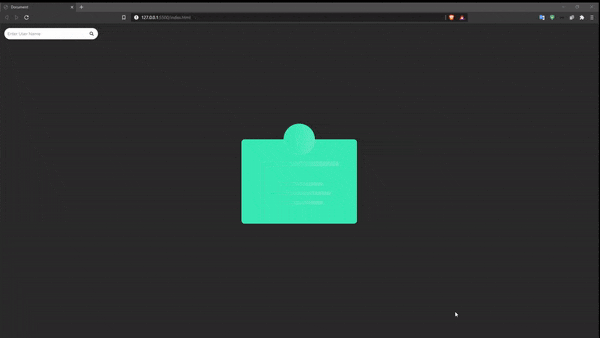
Before getting started. lets look at the final product that we will be building
Things we will be covering:
a) Creating Animated Skeleton Screen
b Displaying User Profile without reloading the page
c) Error Handling when a user is not found.
Lets Begin!
Start by creating an empty folder and opening it in VS Code. We will need three files, the HTML file for creating out layout of the page, CSS file to design the page and JavaScript file for sending request and receiving responses to then load content in our screen.
I have named these files index.html, index.css and index.js (You can name then as you want).
THE HTML
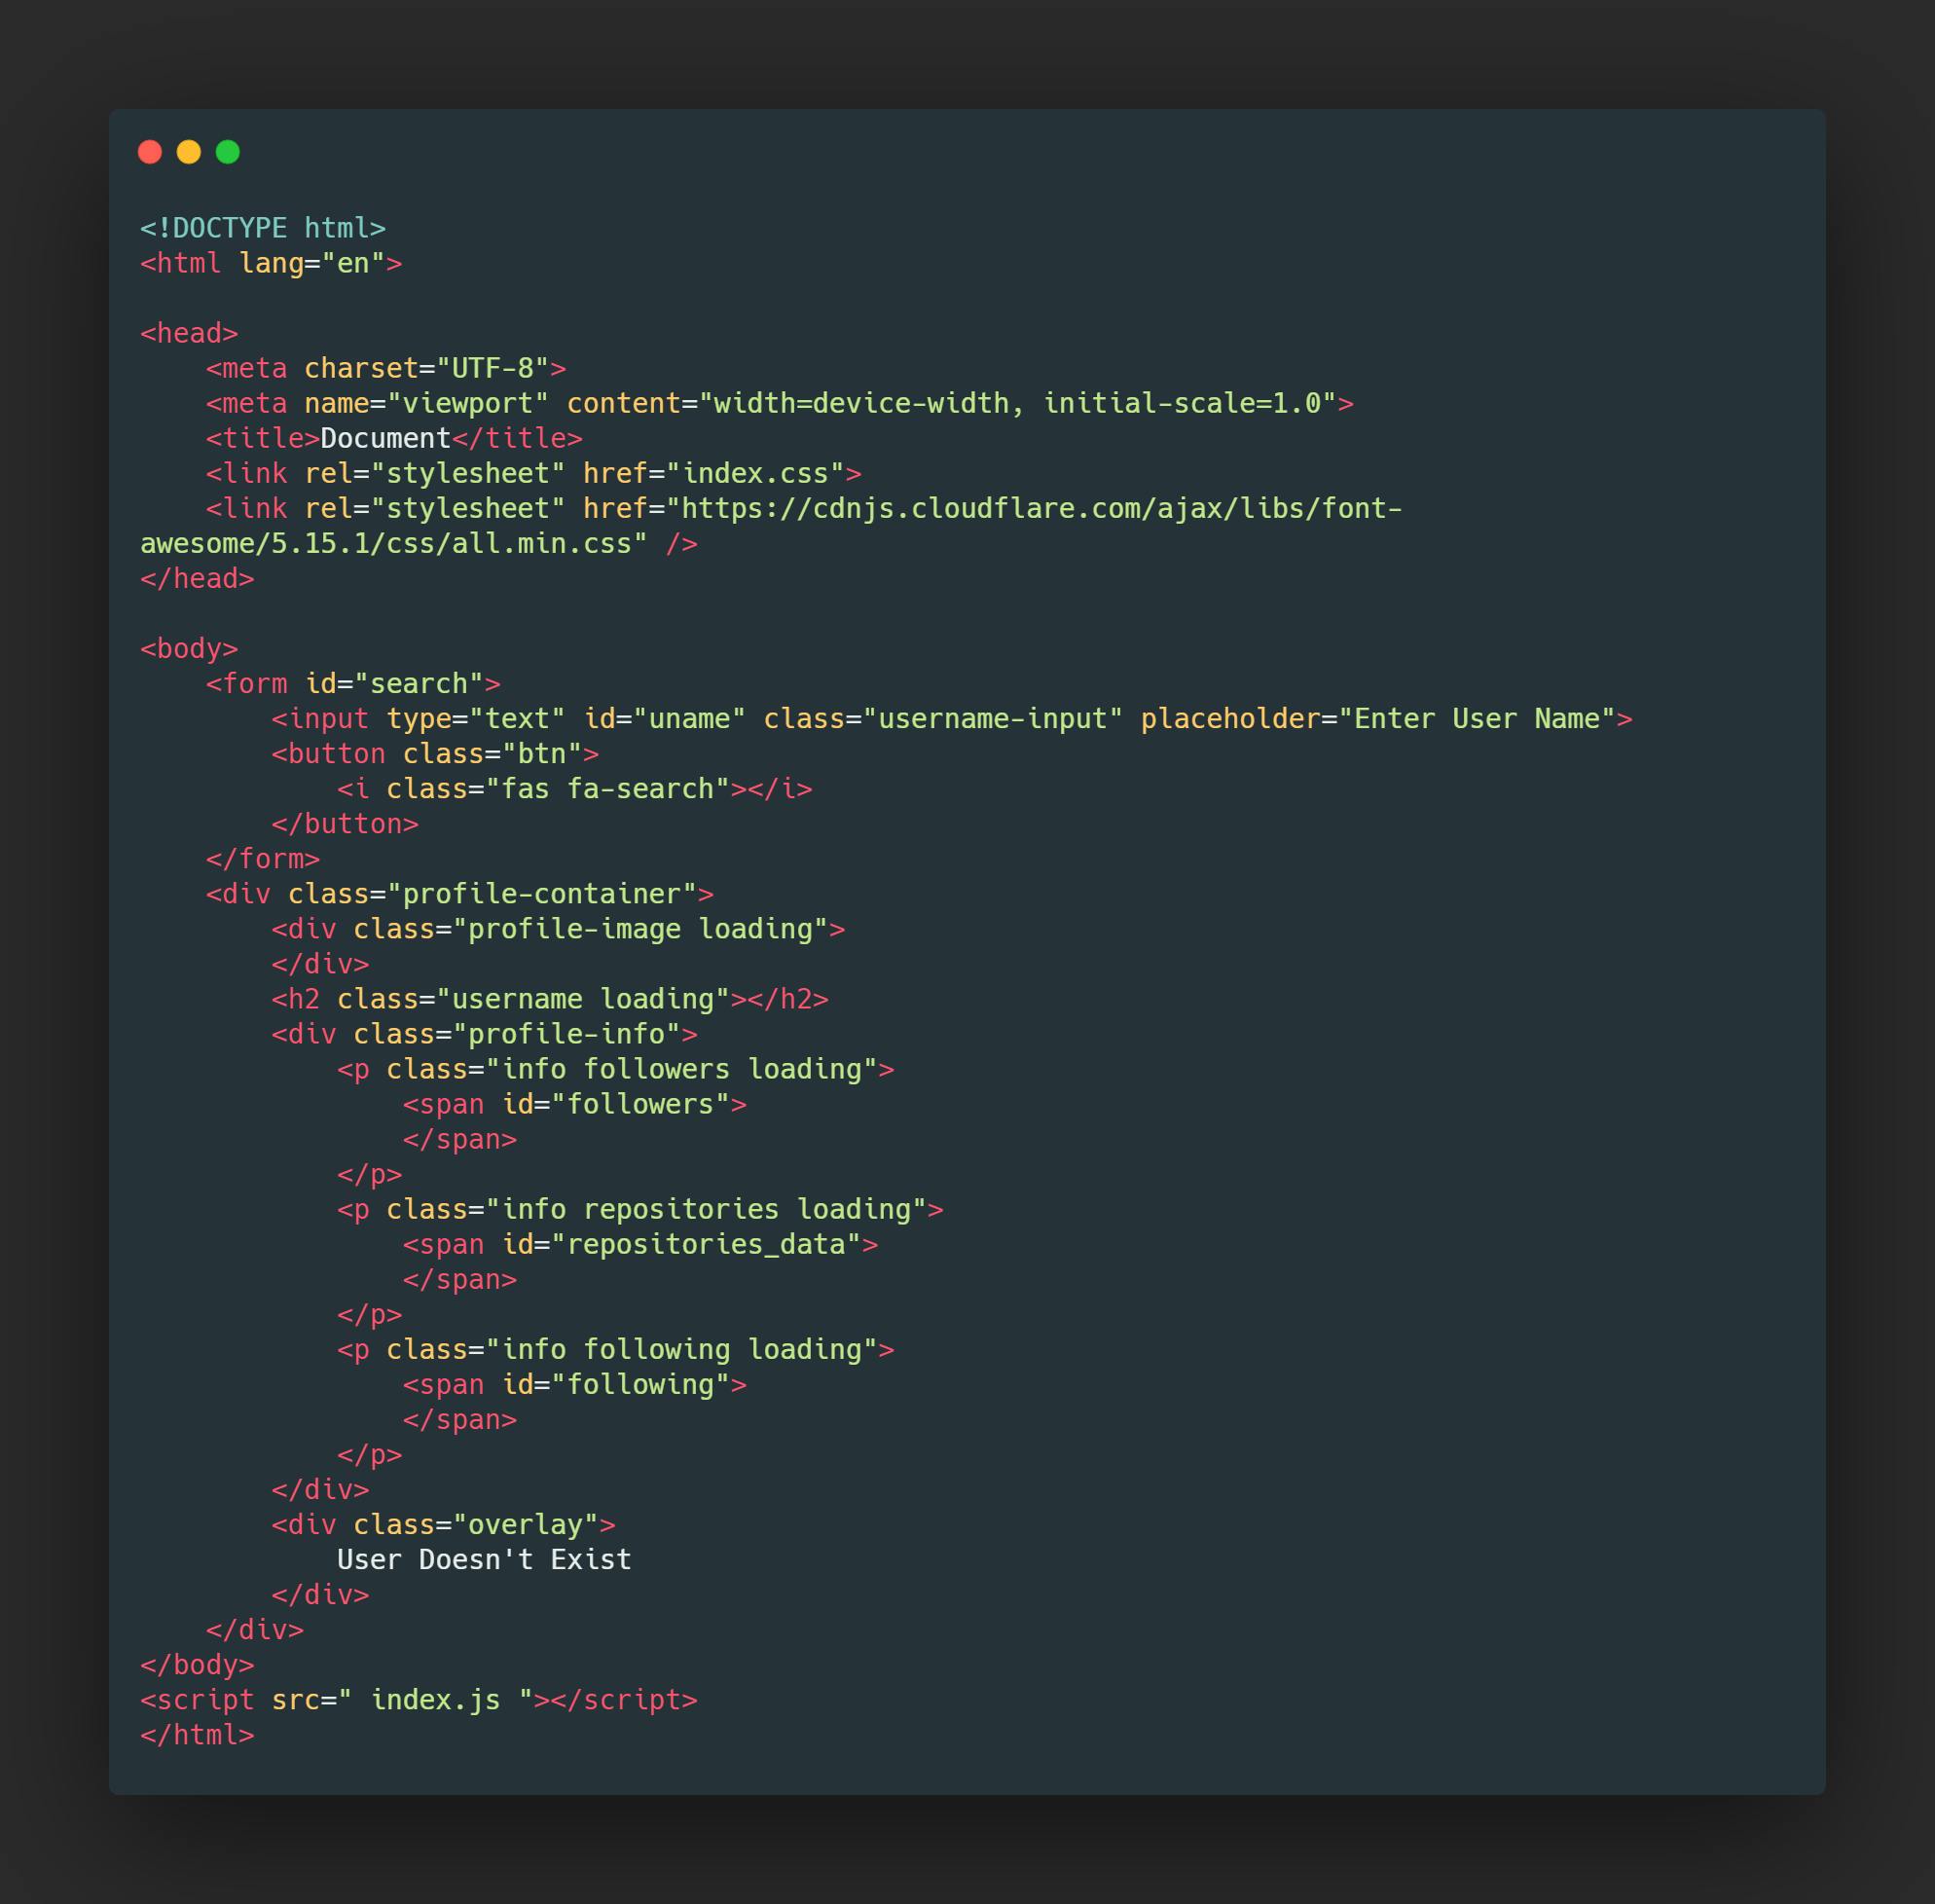 Code in HTML
The HTML contains only the layout aspects of our application. The body of the HTML consists of a form element with a input text and a button. The another child of body element is a container that contains a division with a class of profile container containing multiple children.
The first child being a division that will later wrap an image tag
Second child is the h2 tag to have user’s name to be embedded later
A profile info division that contains 3 paragraphs tad that houses a span tag which will later be embedded with follower, repository and following count.
Finally, an overlay division is created to be viewed if the entered username does not exist in GitHub database.
The only interesting thing in this HTML is every section that need to be updated with content, has a class of loading into it. This loading class is styled in CSS in such a way that it describes only the basic layout of the content in the card.
THE CSS
The code in CSS of the app is quite long, hence I would suggest you to come up with your own design to implement here.
We will only see the styles applied in Loading class as it is the one responsible for the skeleton effect.
The loading class here is given a background of a linear gradient along along with certain width and height. Also, the linear gradient is then animated.
Moreover, if we also need to assign certain width for certain elements in the page.
These styles are just for providing a certain width and height to the classes in HTML so that the skeleton screen looks appealing (Better UI).
Again, for more styles, visit GitHub Repository of this project.
THE JAVASCRIPT
The JavaScript of this project is very simple! Here is a graph showing the progression of the application
We see that the app’s initial state is a waiting state, where users needs to input a username. When a username is entered, then the app requests the server the data it needs to receive, and then displays it to screen. The time between requesting to the server and getting response back is fulfilled by the skeleton screen.
Thus, we first need to select all contents that need to be set on skeleton form. They being the wrapper division for user avatar, the username division, the span tag where we display followers, repositories and following of a certain user and finally the overlay that is shown if the entered user doesn’t exist.
We also need to select the form as we need to add the submit event listener to it so that we submit the username to server.
The next thing that we need to perform is to have an event listener to the form when we submit it. We first need to get the username from the input field, store it in a variable, set the value inside the input field to null and have the cursor to focus on it.
Moreover, once the submit button is pressed, we need to fetch data from API. Thus, a function apiCall is called which accepts the username of user as argument.
We see that the function apiCall is not created. Lets see what we need to do in this function. The main objective of this function is to request data from the API. Hence, we make use of fetch() method in apiCall function.
API for GitHub: https://api.github.com/users/<your_user_name>
The fetch function first has to go out to the resource provided by GitHub. We know that fetch returns a promise, thus we can make use of .then() and .catch() methods in it (Alternatively, using async and await will also work).
First, if the Promise returned by the fetch method is fulfilled, then we receive a response which needs converted into JavaScript object before we use it in the application. Here you may think of using JSON.parse() to parse the incoming response, but that is very not true.
See, JSON.parse() is synchronous in nature, hence it runs on same thread as our main program. The response that we receive however is a Promise, thus it is asynchronous in nature. If we convert the response onto JavaScript object using JSON.parse(), we will not be getting any data as the fetching of data is done in separate thread, where the response is received as a callback. Hence, JSON.parse() cannot be used.
Instead of using JSON.parse(), there is an asynchronous way of parsing data into JavaScript object, that is by using .json() method. This works very similar to JSON.parse(), but it returns a Promise which eventually gets resolved as JavaScript object. Hence, as .json() is also asynchronous in nature and returns a promise, we can the utilize it to parse the incoming response into the JavaScript object and use it later on.
As the response is parsed into JavaScript object and a promise has been returned, we can again chain another .then() method to it to then get the data that has been parsed.
If we see submit any name from the form, and check in the browser, we can see that we receive the information in JavaScript object format of the user name that has been typed.
But, we still do not see what we intended to. We have to be able to update our container to display the required data and also have a running skeleton screen.
First lets work on displaying data on the screen once we fetch it. We will require a function to render data once we receive it. We will call this function once we receive the data.
As we see, that the data we receive is then sent to renderOutput function that accepts an object as an argument, asking for name, followers, following and repositories. The incoming values are then injected into the DOM.
If we look at the application now, we can see the data in the screen, but the skeleton screen has not vanished. To remove the loading state of the app, we need to remove the loading class from every element in our HTML. Lets make a function that removes loading class from the HTML elements, and call it from renderOutput function
Now if we see in the application, we can see that once we enter the username, the skeleton vanishes and the data is displayed. But, the avatar is still not visible as we need to inject image tag from JavaScript as the HTML only contains wrapper for the image. Lets make a function createImage that accepts the source of image which then creates the image and appends as a child to the parent division present in HTML
This function needs to be called before we call renderOutput function from the apiCall function, as we need to have image ready before we render anything on the screen.
At this point, we are very close to the end. However, we still need to see what to do if user sends an invalid request (user name of user who doesn’t exist).
As we see, the response is still in JSON format that has a “message” key instead of sending a 404 error. Thus, we can catch that in the app.
In apiCall function, before we call createImage function, if the recieved data has a message key, then we can simply throw an Error, which can be caught below.
Now if we send an invalid request, then in console we can see the error that says “Error in Certain Line”
Once the error is caught, we then need to first have an X symbol as the image, and also enable the overlay that says “User Does not Exist”. We will make a function that will enable the change the style in overlay from visibility of hidden to visibility of visible. The function will act as dual purpose, as it will also create the image with a cross symbol on it.
Get The Image Link for Image with a Cross Logo Here
This then handles our error. However, after an invalid username is entered, if we enter the nave of a valid user, then the overlay must disappear. The one line of code for it will be written after we call renderOutput function in apiCall function.
The only thing left to do is now to solve the issue of stacked images. It is fairly simple and we do it by first clearing all the fields and then adding the loading class back. The clear fields function will be called once the form is submitted and the function to add loading class will be called inside the clear fields function.
If we checkout the application now, we will see everything will be in working order.
With this, creating a simple skeleton screen in API calls comes to an end.
Thank You Very much for reading the article! If any part of it confuses you, you can e-mail me or even ask it in the comments!!!!
Signing Out!! Adios!✌✌